One of my favorite things as an interior design student was learning to follow the process. Whether designing a logo, a home or a website, I'm sharing what I have found to be key in the creative process.
Write A Concept Statement
Every good design project has a story to tell... but the catch is someone has to write it. But what exactly is a concept statement? According to an article by Emotive Brand, "To put it simply, a concept statement is a small look at a big plan." Even if it's for your eyes only, it's certainly a great way to pull you and your team's thoughts together to ensure the project's vision aligns.
How To Write A Strong Concept Statement
There are a few things to keep in mind when it comes to crafting an effective concept statement. It's a good rule to keep it at around a 3-4 sentence paragraph. Secondly, you want to use intentional and specific adjectives as apposed to overused descriptors. For example, instead of using the combination of the beautiful patio (because duh, you want it all to be beautiful), try something like the flagstone patio. Remember, you're doing your best to paint the picture of your project before you ever use anything visual.
If you struggle with writer's block, start a 2 minute timer and start listing words that come to mind when you think of the project at work. It can be anything, just don't stop writing until time is up. This will help get the juice flowing and may even create some key words to pull into your concept statement.
Here's my concept statement for our current house project:
A EUROPEAN HOMESTEAD STYLE DWELLING NESTLED INTO THE OAK TREES OF THE TEXAS HILL COUNTRY ON 10 ACRES — ACCOMPANIED BY A STABLE + BARN COMBINATION. CENTERED ON THE COURTYARD LAYOUT IS A GATED MINIMALIST STYLE SWIMMING POOL AND VEGETABLE GARDEN WHILE AN INTIMATE BREEZEWAY CONNECTS THE 2-BAY CARPORT THAT HOUSES AN OFFICE SPACE. DETACHED FROM THE HOME IS A STUDIO STRUCTURE ALSO EQUIPPED TO ACCOMMODATE GUESTS AND PROVIDE A FLEX SPACE.
Make A Mood Board
Probably one of the most fun parts of design is to pull together inspiration photos that eventually create a mood board. This is the time to think outside the box and it's important to avoid being too rigid. I like to think of pulling this together as if you were creating a well balanced dish.
My example below shows a mix of interior photos that inspire me, but also textures and colors that I want to incorporate in some way. I find it helpful to pull in key words that represent the photos so I can remember what sparked my interest when I found them.

Digitize Your Finishes
Now that you've put your ideas in writing and represented them visually, you should find the transition into making material decisions pretty smooth. Start a list of your general finishes and from big to small and put them on their own sheet. Next, begin breaking out a sheet per room and include fixtures such as faucets, hardware and lighting.
Bonus points if you include links and order samples of your finishes so you can keep everything organized and ensure you like to look and feel in person as much as you do online.

Get A Rendering
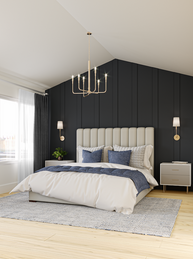
Last, but not least I highly recommend getting a 3D rendering of your main areas such as the living, kitchen, bathroom and any flex spaces you have trouble envisioning. Renderings are such an effective tool because they can tell you in real-time how your material selections will look. Not sure about a paint color or light fixture? Get a rendering showing each and then you'll know for sure!
Here's just a peek at some of the projects where we've helped our clients bring their vision to life. If you want to see more, feel free to visit our gallery.
Below I have linked our rendering bundles that will give you a sweet discount to help fit your budget. Keep in mind you can certainly build your own or get a single rendering if that works best for you!


Comments